How to Set a Logo for Your Web Portal
Setting a logo for your TGmembership web portal is a simple and effective way to personalize your online presence. Follow this step-by-step guide to upload your custom logo and make your web portal visually appealing.
Step 1: Access the Web Portal Settings
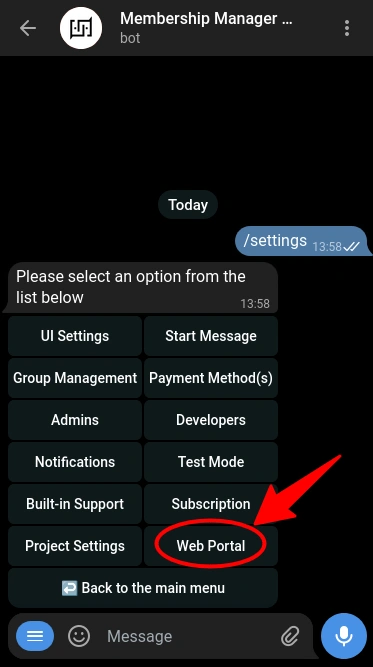
Start by accessing the /settings menu in your bot. From the submenu, select 'Web Portal' to open the configuration options.

Step 2: Select the 'Logo' Option
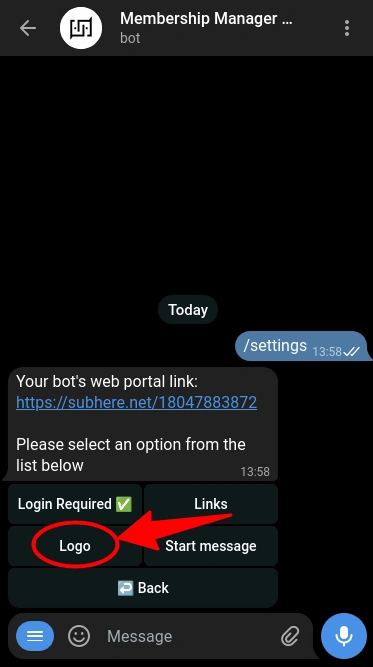
Next, choose the 'Logo' option.

Step 3: Upload Your Logo
The bot will prompt you to send the logo you want to use. You can upload the logo as either a photo or a document. Ensure your logo meets the following requirements:
- Format: JPEG or PNG
- Maximum File Size: 50 kB
- Displayed Dimensions: 250x40px (logos larger than this will be scaled down while maintaining the original aspect ratio).
Send your logo file to the bot. If the file format or size doesn't meet the requirements, the bot will notify you to correct it. Once the logo is successfully uploaded, the bot will confirm the update.
Step 4: Wait for the Update
Your new logo should appear on the web portal within a few minutes. If the user has already loaded the website, they may need to clear their browser data to refresh the web portal’s cache. A 'Clear Browser Data' button is conveniently located at the bottom-right corner of the web portal for this purpose.
And that's it! You’ve successfully customized your TGmembership web portal with a new logo. A personalized logo enhances your branding and ensures your portal stands out to your customers.