Integrate Authorize.Net with TGmembership
Authorize.Net is a robust and widely trusted payment gateway service that empowers businesses to securely process online transactions. With its reputation for reliability and advanced features, Authorize.Net has become a go-to choice for e-commerce businesses and organizations looking to facilitate online payments seamlessly. Among our competitors, only TGmembership offers seamless integration with Authorize.Net, giving you a unique edge in the market. In this guide, we’ll walk you through the steps to integrate Authorize.Net with TGmembership, ensuring secure payment processing for your Telegram-based memberships and subscriptions.
Step-by-Step Integration Guide
Step 1: Access Payment Methods in TGmembership
Start by opening your TGmembership-powered bot in Telegram. Type "/settings" to access the settings menu. From there, select "Payment Methods" to view the available options. Locate the Authorize.Net button and click on it to begin the setup process.

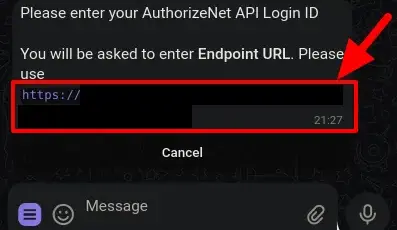
Step 2: Obtain the Endpoint URL
Once you click the AuthorizeNet button, your bot will generate a unique Endpoint URL. This URL is required to receive notifications from Authorize.Net. Copy this URL and keep it safe for the following steps.
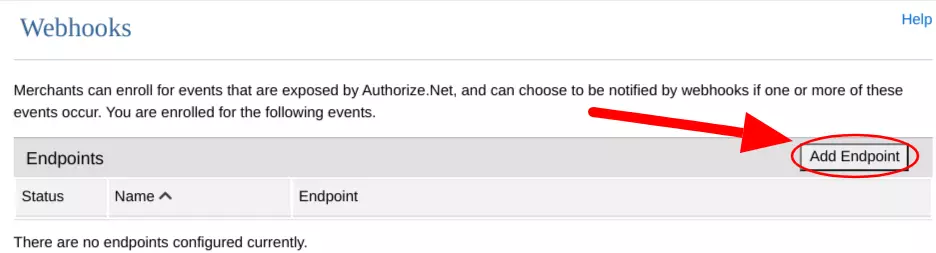
Step 3: Configure Webhooks in Authorize.Net
Log in to your Authorize.Net account and navigate to the Account section. From there, select Webhooks.

Step 4: Add Endpoint
Click the Add Endpoint button to create a new webhook endpoint.
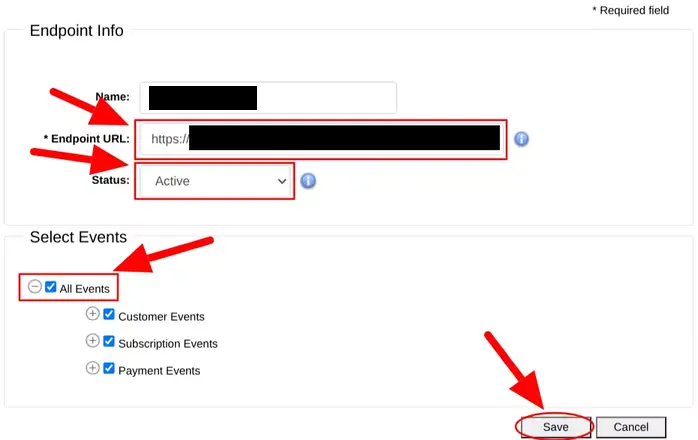
Step 5: Configure the Endpoint
In the Endpoint URL field, paste the URL provided by your TGmembership bot. Ensure the following settings:
- Set the status to Active.
- Select All Events.
Then, click Save.
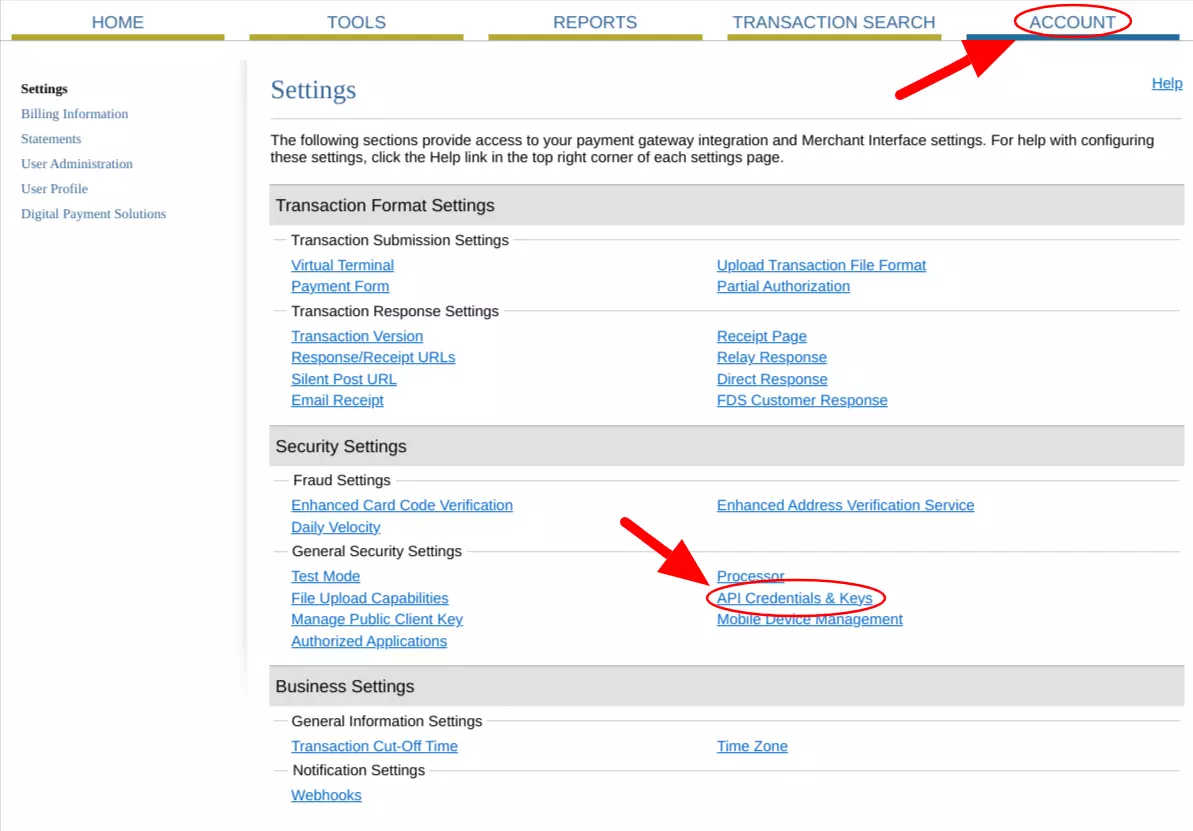
Step 6: Obtain API Credentials & Keys
Return to the Accounts section in your Authorize.Net dashboard and select API Credentials & Keys.
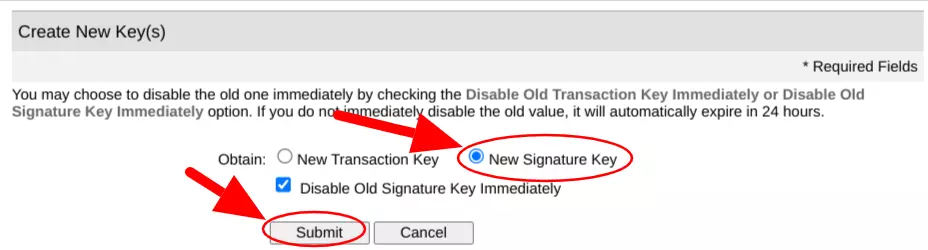
Step 7: Create a New Signature Key
Click New Signature Key and then click Submit. Note down your API Login ID, Transaction Key, and Signature Key as these will be used in the next step.
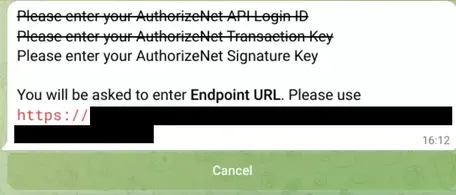
Step 8: Enter API Credentials in TGmembership
Go back to your TGmembership-powered bot and provide the following credentials:
- API Login ID
- Transaction Key
- Signature Key
Your bot will confirm the successful integration.
Step 9: Integration Complete
Congratulations! You've successfully integrated Authorize.Net with your TGmembership-powered bot. You now have a secure and reliable payment gateway tailored for your business needs. Start leveraging the unique benefits of Authorize.Net to boost your credibility and grow your subscription-based services.